|
|
|
|
Steps to Follow
|
|
It is assumed that you have successfully installed HC8 and all its pre-requisites. |
Once installation is completed, you need to configure certain settings prior to use HC services. All these configurations are mandatory and cannot be skipped. You have to:
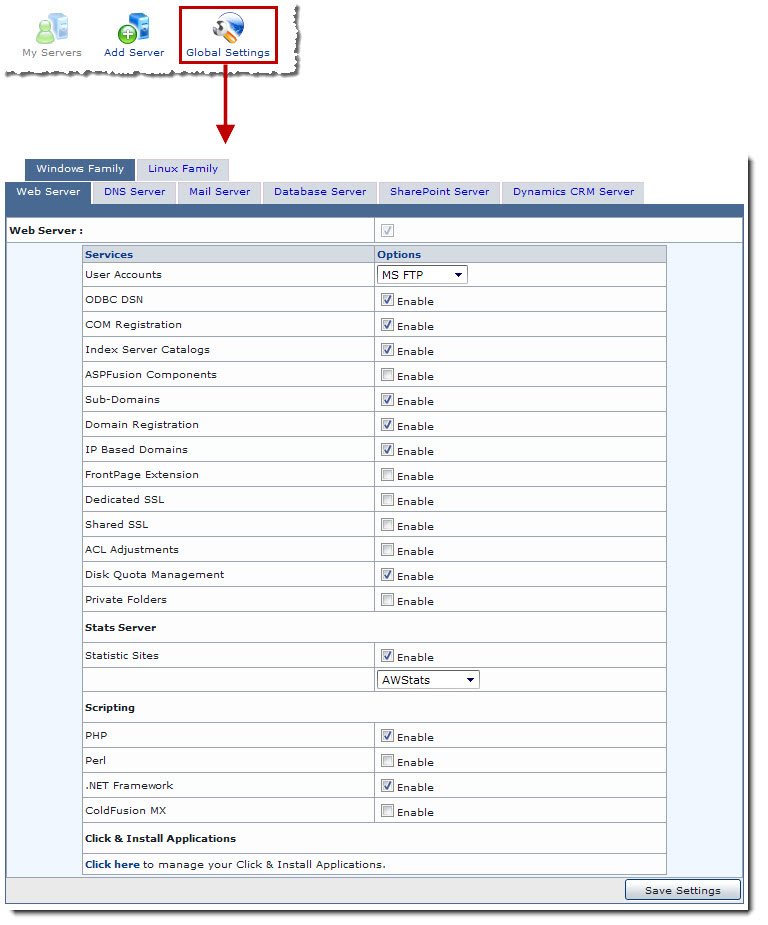
To configure global settingspage:
Login to HC panel.
From
the left menu click General, and
then Server Manager.
Server Manager page is displayed.
Click
Global Settings.
The Global Settings page is displayed.
|
|
The Global Settings page allows you to perform certain configurations in a cluster as per your requirements. |
Available servers to be configured in a cluster are:
Configuring Global Settings

To update personal profile:
Login to HC panel.
From
the right corner of the Home
page, click Profile.
The Update Personal Profile page is displayed.
Specify
your accurate personal information and click Update
General Profile .
The Personal Profile is updated.
Updating Personal Profile

|
|
Prior to Add Server, you should perform certain configurations. To do so, go to Global Settings. |
|
|
To Add Server, you should know the followings:
|
To add a server:
Log on to HC panel.
From
the left menu click General,
and then Server Manager.
Server Manager page is displayed.
Click
Add Server.
The Add Server page is displayed.
|
|
The Add Server page allows you to add multiple servers in a cluster as per your requirements. |
Available servers to be added in a cluster are:
Windows Family
Linux Family
Adding a Server

|
|
Hosting Controller initially installs in trial mode. The trial period expires after 30 days. If you want to use the product after that, you need to buy a license and activate the product. The license can be purchased from Hosting Controller online store. To purchase a license, select Buy Now. |
|
|
Once you have the license key, you must activate it. |
|
|
License can be activated in two different ways. |
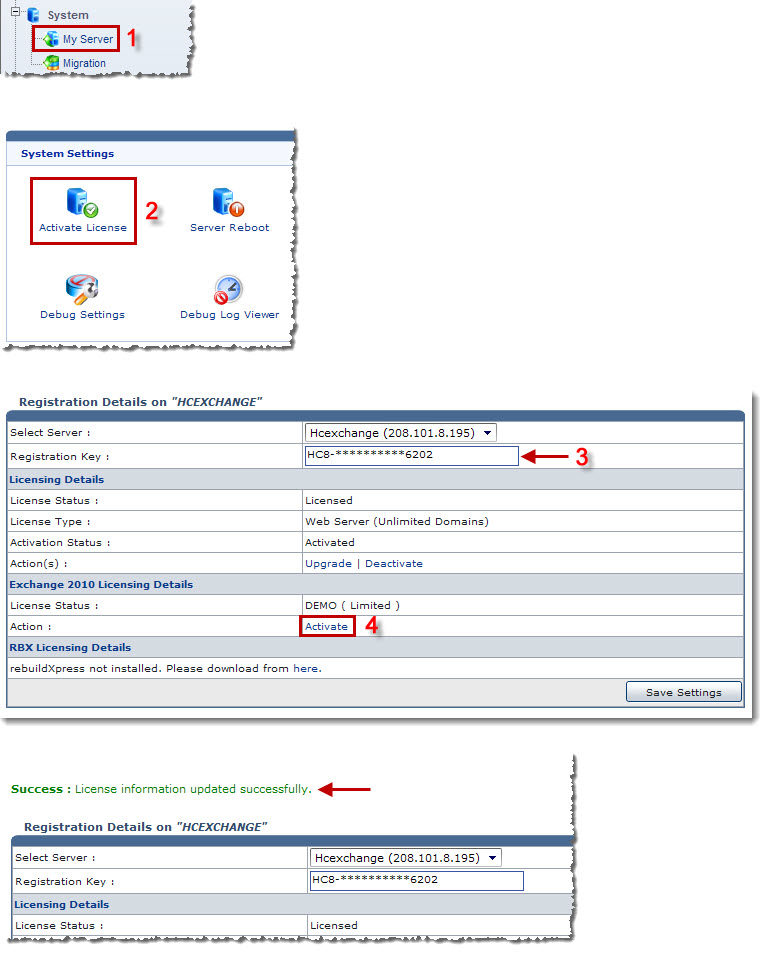
To activate license (option 1):
Log on to HC panel.
From
the left menu click System, and
then My Server.
The My Server page is displayed.
Under
System Settings section, click
Activate License.
The Activate License page is displayed.
In Registration Key field, type key for registration.
Under
Licensing Details, against Action field, click Activate.
The License is activated.
|
|
Once Activate is clicked, Hosting Controller contacts its License Management Server. If the activation is successful the Activation Status is updated as Activated and a success message is shown otherwise an appropriate message is displayed in red. |
Activating License (Option 1)

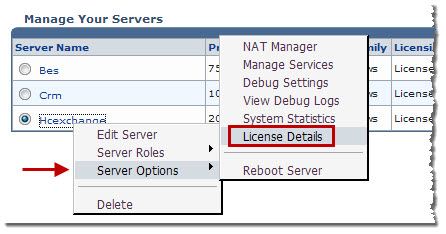
To activate license (option 2):
Log on to HC panel.
From
the left menu click General, and
then My Server.
The My Server page is displayed.
Under
Server Name column, click required
server.
A sub menu is displayed.
On
the sub menu, point to Server Options,
and then click License Details.
The Activate License page is displayed.
In Registration Key field, type key for registration.
Under
Licensing Details, against Action field, click Activate.
The License is activated.
|
|
Once Activate is clicked, Hosting Controller contacts its License Management Server. If the activation is successful the Activation Status is updated as Activated and a success message is shown otherwise an appropriate message is displayed in red. |
Activating License (Option 2)

Related Links:
License Activation for Click & Install Applications
What if Server Activation is not successful?