|
|
|
|
Adding a Mail Server
To add a mail server:
Log on to HC panel.
From
the left menu click General, and
then Server Manager.
The Server Manager page is displayed.
Click
Add Server.
The Add Server page is displayed.
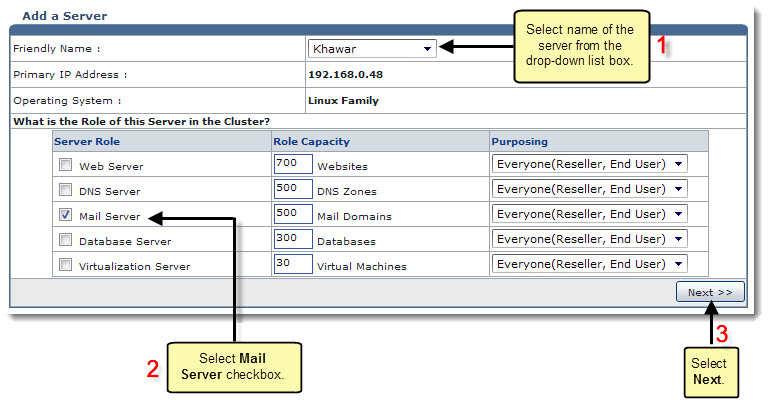
Click the Friendly Name arrow and select the required server from the drop-down list box.
|
|
|
Under
Server Role, select the Mail Server check box.
|
|
Every server can have one or more role(s) in the cluster. These roles need to be set every time a new server is added to the cluster. |
Under Role Capacity, type the number of Mail Domains supported by the server.
Under Purposing, click the arrow and select the end user for the server.
|
|
The server role added in the cluster can be used either dedicatedly for a Reseller or for shared hosting. A role dedicated to a Reseller can not be used for any other user. |
|
|
|
Click Next.
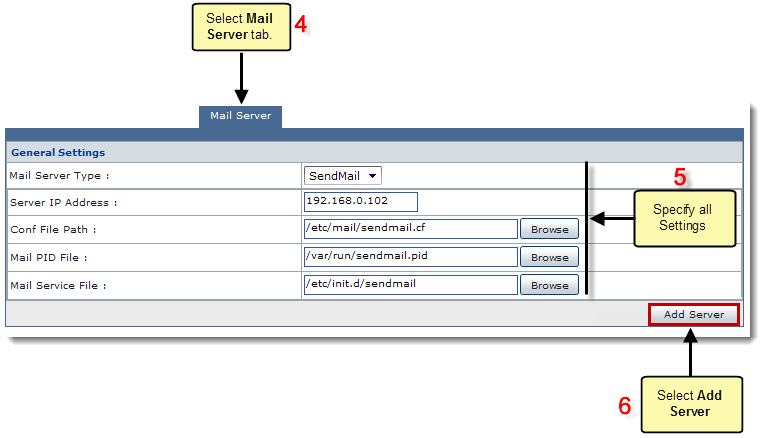
The Mail Server Configurations page is displayed.
Specify the General Settings:
|
|
General Settings depend on the Mail Sever selected in the Global Settings. |
Mail Server Type: Click the arrow and select the type of Mail Server from the drop-down list box.
Server IP Address: Type IP address for the server to be added.
Conf File Path: Enter the path for Conf File.
Mail PID File: Enter the path for Mail PID File.
Mail Service File: Enter the path for Mail Service File.
Click Add
Server to update the cluster.
A MAIL SERVER is added with
the specified information.
Adding a Mail Server
Related Links:
|
Web Server (Linux) |
Database Server (Linux) |
DNS Server (Linux) |
![]()
|
© Hosting Controller 1998-2011. All Rights Reserved |


