
HCNIX INSTALLATION GUIDE
For Linux
© Hosting Controller 1998 – 2010. All Rights
Reserved.
HCNIX INSTALLATION GUIDE
For Linux
© Hosting Controller 1998 – 2010. All Rights
Reserved.
Contents
HCnix
Supported OS and Distributions
© 2010 Hosting Controller. All Rights Reserved.
This document is the property of, and contains proprietary information of Hosting Controller. No part of this document may be reproduced or transmitted in any form or by any means, electronic or mechanical, including photocopying or recording, for any purpose other than consideration of the technical contents without the written acquiescence of a duly authorized representative of Hosting Controller.
|
TERMS/ SYMBOLS |
WHAT THEY
MEAN? |
|
BOLD |
The ‘Bold & UPPERCASE’ text is used to highlight
vital terms in the document. |
|
|
This symbol is used as a sign for NOTE. It reminds
about certain noteworthy steps or takes your attention towards the
significant tasks to be done or gives additional information for your
ease. |
|
|
This symbol is used as a sign for WARNING. It
highlights some steps that cannot be skipped or should be followed as stated
to avoid errors and confusion. |
This document is intended for all those who want to install HCnix on their systems. It describes all the prerequisites and installation steps that assure successful installation and working of HCnix on Linux platform.
Please, read this document to have absolute information and to avoid any type of ambiguity related to the installation process.
It enables web hosting companies to manage all their GNU/Linux servers through centralized interface. You can expand your business with HCnix, from one server to cluster of servers. It allows you to add new clusters as per your requirements.
|
|
|
Prior to install HCnix on your machines, you should separately install your required applications/software on your server before running HCnix installer i.e. Web/DNS/Mail/Database Server etc. Following is the list of all such servers that should be properly running on your system before installing HCnix.
Ø Web Server Role
o Apache2.x Web Server
o Vsftp/wu-ftp
o Quota Package
o ACL Package
o Webalizer (on your choice)
o xinetd Package
Ø DNS Role
o BIND9
Ø Database Server Role
o MySQL Database
Ø Mail Server Role
o Sendmail/Qmail with VPOPMail/Exim
o xinetd Package
o Courier-Imap(For Qmail)
|
|
|
As far as operating system is concerned, HCnix supports the following:
Ø Linux (Kernel 2.11.x or later with glibc6)
HCnix supports GUN/LINUX Distributions like:
Ø SuSE 10.x and later
Ø Debian 4.x and later
Ø Ubuntu 5.x and later
Ø CentOS: 4.6 and later
Ø Fedora Core 4 and later
Ø
Redhat®
|
|
n |
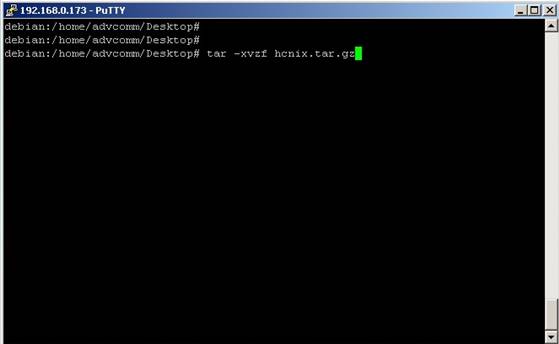
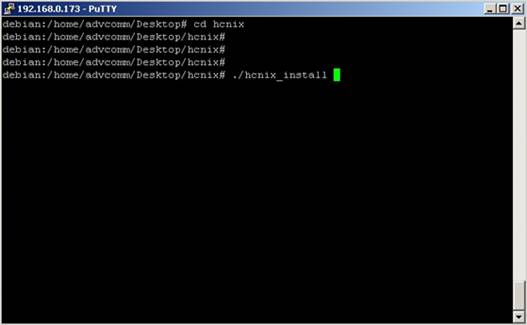
The steps should be followed as stated to avoid any type of confusion and faulty installation of HCnix.
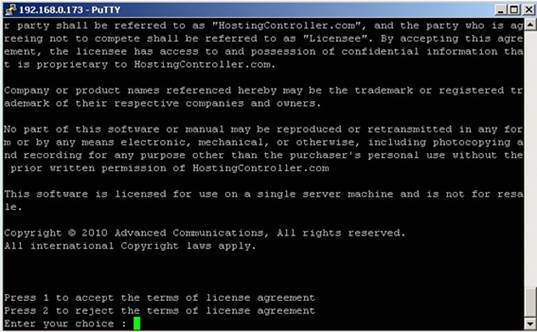
Now, you need to
select whether you accept the license agreement or not.
To accept the terms and conditions, select 1. In case of disagreement with any of the terms, select 2.
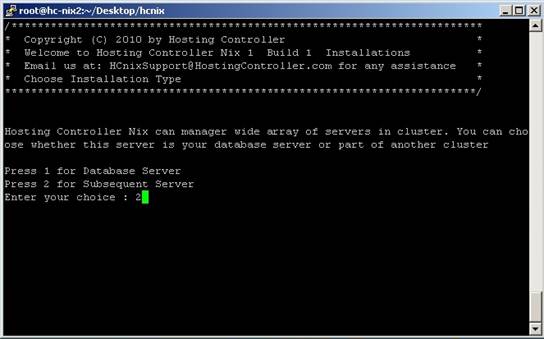
Select your server as required. If the server where you are installing HCnix is a Database Server where you want to create HCnix database too then select 1. Otherwise, select 2 if it is a Subsequent Server.
|
|
|
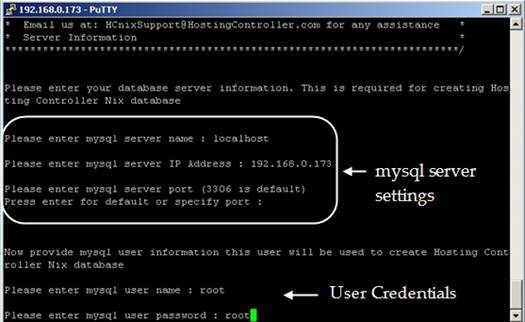

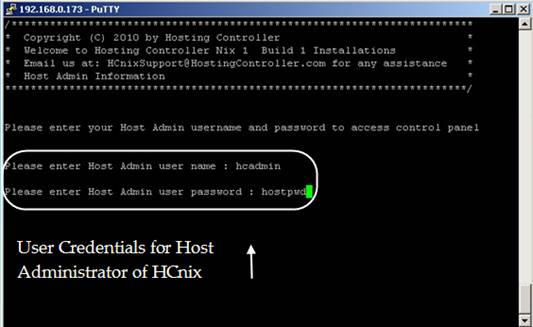
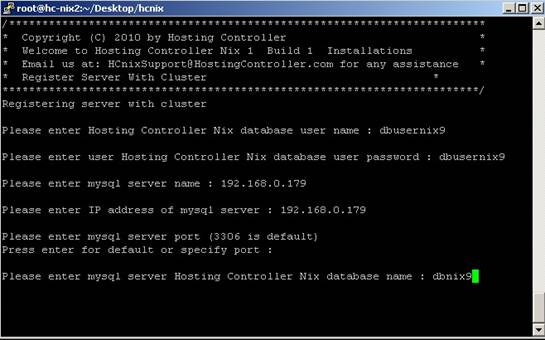
These are HCnix database information that creates during the installation.
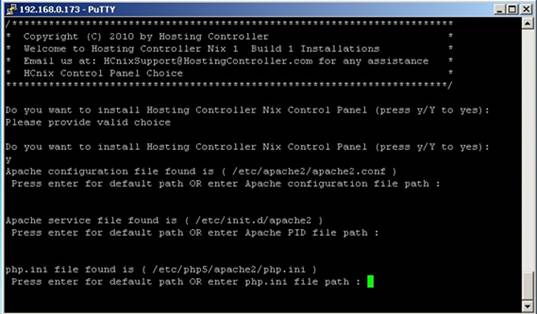
Specify your required paths for the service being installed or proceed with the default paths as per your requirements.
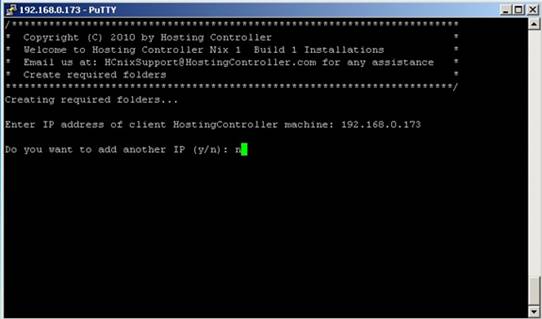
You can add more than one IP address for HCnix client machines as required. To add another IP address, select ‘y’. If you don’t want to add another IP, select ‘n’.
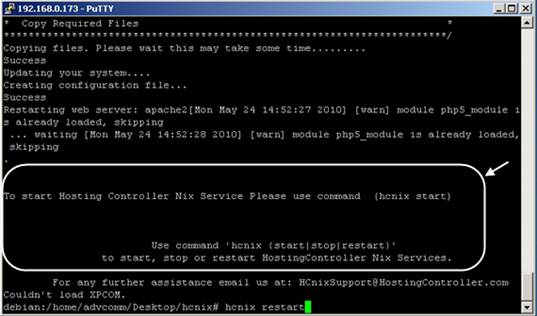
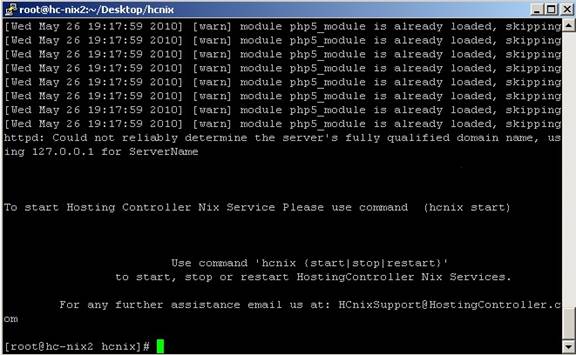
You can start/stop/restart HCnix services using the commands shown
below:
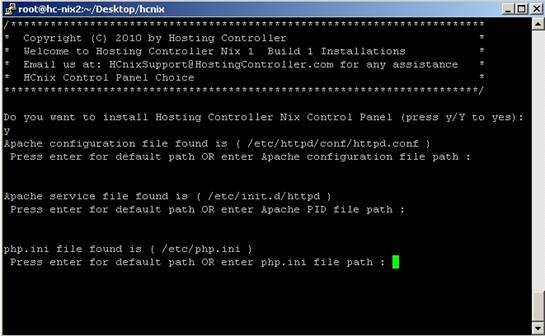
Specify your required paths for the service being installed or proceed with the default paths as per your requirements.
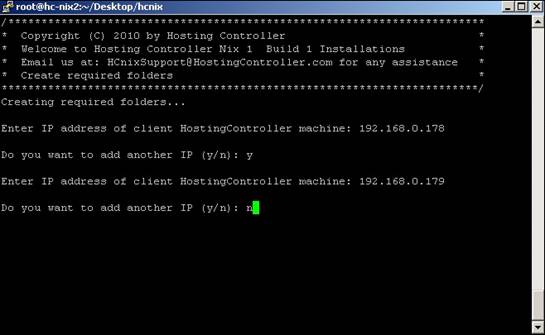
Specify client’s IP address. You can add more than one IP address if required.
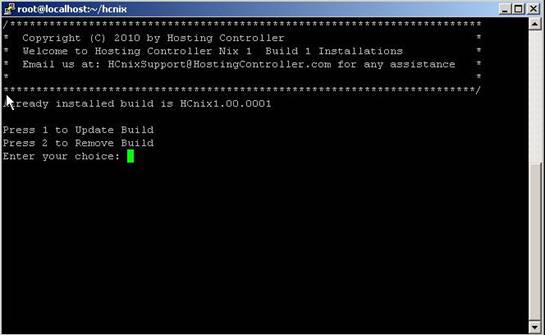
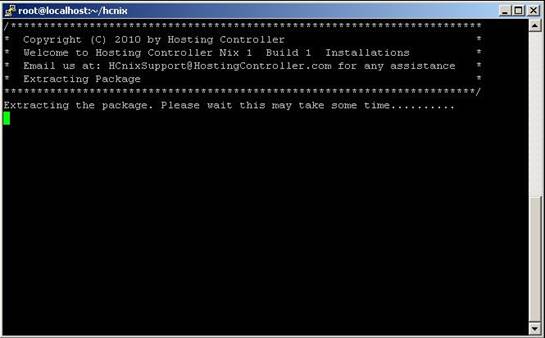
To update HCnix version on your system, follow the steps as stated:
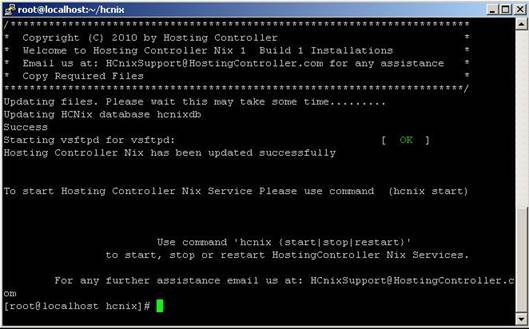
HCnix is updated successfully. You can start/stop/restart HCnix services with the commands shown in the screen shot above.
To remove HCnix from your system, follow the steps as stated:

Select 2 to delete HCnix from your system.
In case of any
ambiguity/query regarding HCnix
installation on your machines, please feel free to contact us at support@hostingcontroller.com