|
HOSTING CONTROLLER 8 MANUALS :: Reseller |
|

|
HOSTING CONTROLLER 8 MANUALS :: Reseller |
|
To view public folders of the selected Mail Domain:
Click the Tools menu under the Toolbox section.
Click the Mail Manager submenu.
Select the Mail Domain as required and then select Public Folders.
Selecting Public Folders opens following screen:
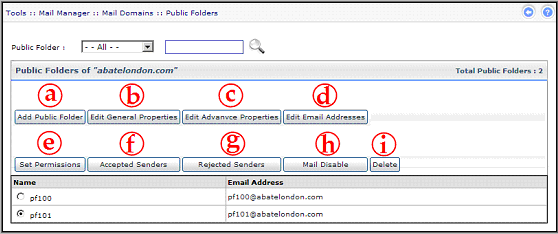
a) Add Public Folder
It allows you to add Public Folder(s) as required. These are shared folders that you can create for sharing data or any other information/knowledge etc. Selecting "Add Public Folder" opens following screen:
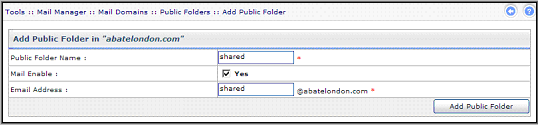
Specify required information and select "Add Public Folder" to proceed. It adds the public folder and displays message as appropriate.
b) Edit General Properties
It allows you to modify general properties. Select "Edit General Properties" opens following screen:

Modify the information as required and select "Update Public Folder" to save and apply changes. It modifies the specified information and displays message as appropriate.
c) Edit Advance Properties
It allows you to modify advance properties. Select "Edit Advance Properties" opens following screen:
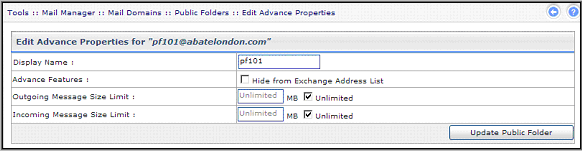
Modify required information and select "Update Public Folder" to save and apply changes. It modifies the specified information and displays message as appropriate.
d) Edit Email Addresses
It allows you to add/remove email address or change Primary Email Address. Select "Edit Email Addresses" opens following screen:
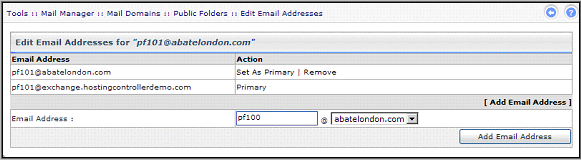
Select "Set As Primary" to modify status of email address as required. To add an email address, select "Add Email Address". It adds the specified email address and displays message as appropriate.
e) Set Permissions
It allows you to specify permissions for the selected Public Folder. Selecting "Set Permissions" opens following screen:
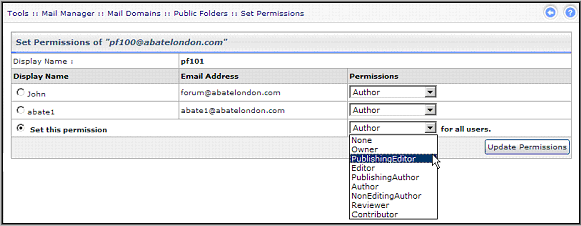
Select permission from the given list as required and then "Update Permissions" to apply the changes.
f) Accepted Senders
It allows you to modify list of people who are authenticated to send Emails. Selecting "Accepted Senders" opens following screen:
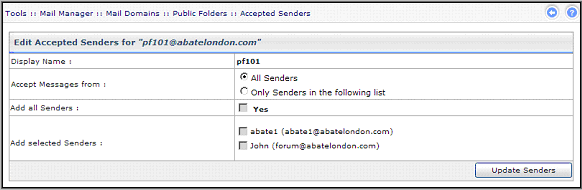
Once you modify the required information, select "Update Senders" to proceed. It updates the specified list and display message as appropriate.
g) Rejected Senders
It allows you to modify list of people who are not authenticated to send Emails. Selecting "Rejected Senders" opens following screen:
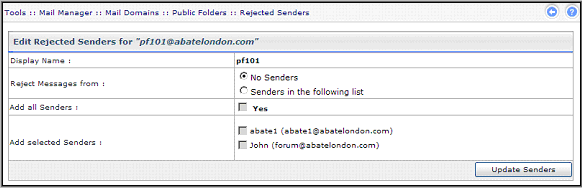
Once you modify the required information, select "Update Senders" to proceed. It updates the specified list and display message as appropriate.
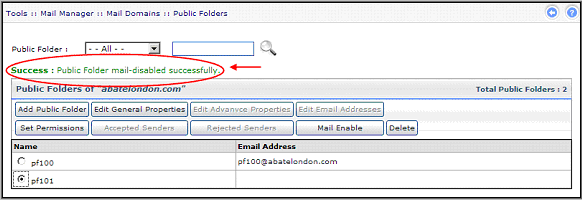
h) Mail Disable
It allows you to disable mail for the selected Public Folder. Selecting "Mail Disable" opens following screen:
i) Delete
It allows you to delete the selected Public Folder. Selecting "Delete" removes the specified folder and displays message as appropriate.