
GLOBALSIGN CONFIGURATION WITH HC
User Manual
© Hosting Controller 1998 – 2010. All Rights
Reserved.
GLOBALSIGN CONFIGURATION WITH HC
User Manual
© Hosting Controller 1998 – 2010. All Rights
Reserved.
Contents
GlobalSign
Configuration with HC
Configure
GobalSign (For Host Administrator)
Manage
GlobalSign Supported Products
Configure
GobalSign (For Reseller)
© 2010 Hosting Controller. All Rights Reserved.
This document is the property of, and contains proprietary information of Hosting Controller. No part of this document may be reproduced or transmitted in any form or by any means, electronic or mechanical, including photocopying or recording, for any purpose other than consideration of the technical contents without the written acquiescence of a duly authorized representative of Hosting Controller.
|
TERMS/ SYMBOLS |
WHAT THEY
MEAN? |
|
BOLD |
The ‘Bold & UPPERCASE’ text is used to highlight
vital terms in the document. |
|
|
This symbol is used as a sign for NOTE. It reminds
about certain noteworthy steps or takes your attention towards the
significant tasks to be done or gives additional information for your
ease. |
|
|
This symbol is used as a sign for WARNING. It
highlights some steps that cannot be skipped or should be followed as stated
to avoid errors and confusion. |
This document is intended for HOST ADMINISTRATORS AND RESELLERS who need to enable and configure GLOBALSIGN with HC. It explains all the technicalities and functionalities of the configuration process in detail. In addition to that, it also states the required steps to ensure flawless working of GLOBALSIGN with HC.
|
|
|
It enables web hosting companies to manage all their servers both Windows & Linux through centralized interface. You can add multiple mail servers within a cluster and offer MS-Exchange & SharePoint hosting. You can expand your business with HC, from one server to cluster of servers. It allows you to add new clusters as per your requirements.
You have to first install it on database server having windows operating system. It can be a standalone server and can have other roles such as Web, Mail and DNS as per your requirements. For further assistance, refer to HC Installation Guide.
Before Installation, you should know the pre-requisites of HC. You have to install Microsoft SQL Server. Instead of this, if you want, you can also download HC installer, in which MSDE is bundled free, depending on your requirements. You have to install Mail Server such as Mail Enable or any other. For websites, you have to install IIS and DNS.
Following figure illustrates working of HC in a cluster environment:
GLOBALSIGN has been securing identities, websites and transactions, worldwide, since 1996. GLOBALSIGN is a well established Certification Authority and SSL Certificate Provider. A leader in public trust services since the very birth of the commercial Internet, GLOBALSIGN Certificates are trusted by all popular browsers, Operating Systems, devices, and applications. GLOBALSIGN is an expert in providing trusted Certificates and secure mobile technology to cellular and mobile devices. GLOBALSIGN has a rich history of investors, including ING Bank and Vodafone. Now, we are part of a GMO Internet Inc group company - a public company quoted on the Tokyo Stock Exchange (TSE: 9449) whose shareholders include Yahoo! Japan, Morgan.
Prior to configure GLOBALSIGN, you have to enable it first. Follow the series of steps as stated to avoid faults and errors.
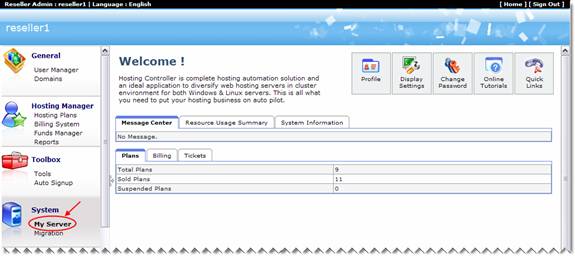
a) Login to the control panel as a host administrator
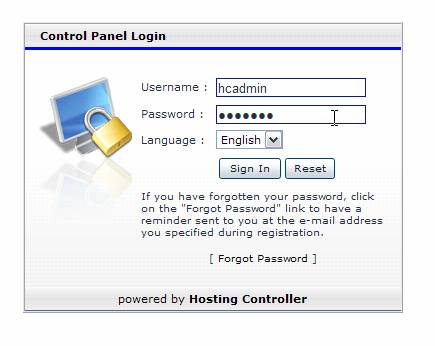
b) After successful login, following screen is displayed:
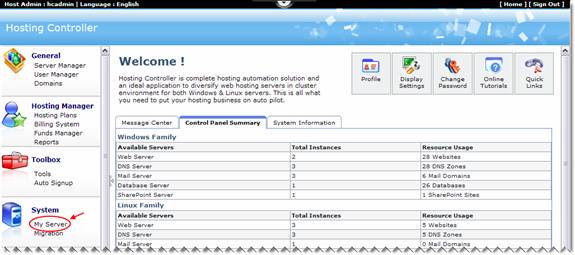
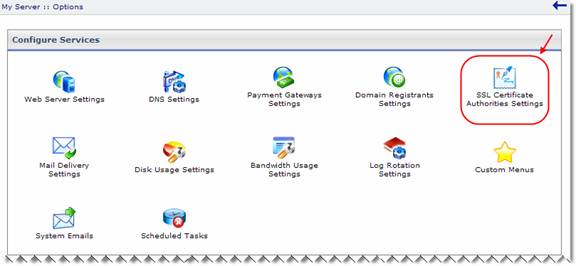
c) Go to “System >> My Server”. It opens following screen:
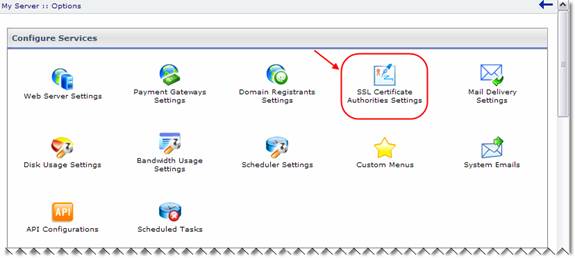
d) Select “SSL Certificate Authorities Settings”. It opens following screen:

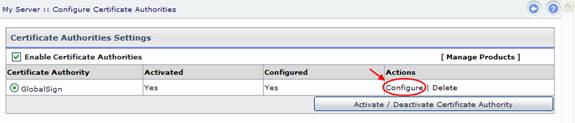
e) Select the checkbox “Enable Certificate Authorities”. It displays further options as:
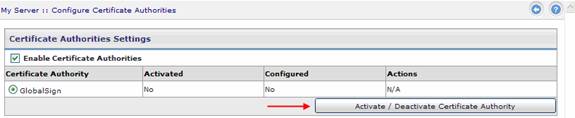
f) Select “Activate/Deactivate Certificate Authority” to enable GLOBALSIGN. It displays the appropriate message as:
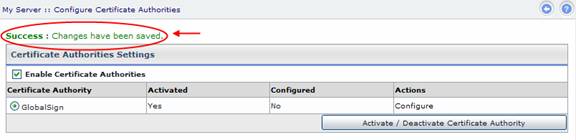
That’s it, GLOBALSIGN is enabled. Now you must configure it as required.
To configure GLOBALSIGN, follow the steps as stated:

|
|
|
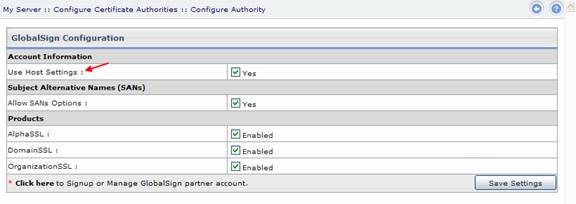
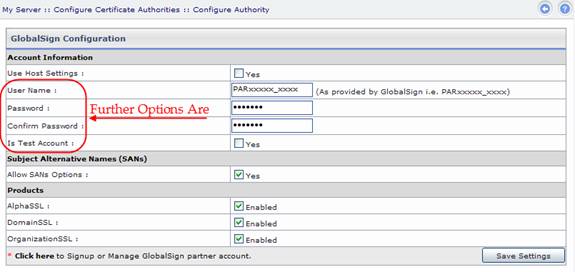
a) Select “Configure” to specify settings for GLOBALSIGN. It opens following screen:
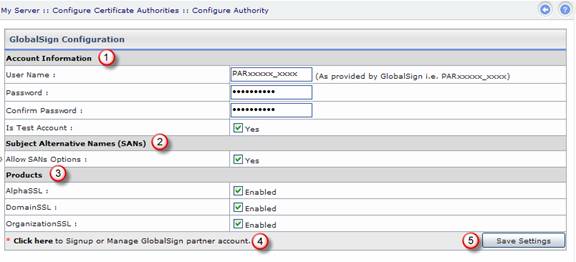
1) Account
Information: Specify your account information, as provided by the GLOBALSIGN. Select the checkbox “Yes”,
if it is a test account. Otherwise, leave it unchecked.
2) Subject
Alternative Name (SANs): Select “Yes” to allow SANs options. Otherwise,
leave it unchecked.
|
|
|
3) Products:
Select “Enabled” for the products, you want to enable/allow. These are GLOBALSIGN supported products. Only the
selected products are visible to WEBADMINS
while adding the SSL.
|
|
|
4) Click
here to Signup or Manage GlobalSign partner account: Select “Click
here” to visit the GLOBALSIGN’S website
to signup for a partner’s account, if you don’t have any.
5) Save
Settings: It allows you to apply the specified changes. It opens
following screen:
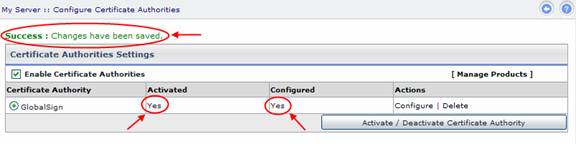
The Products you have selected during the configuration process, you can manage them as per your requirements.
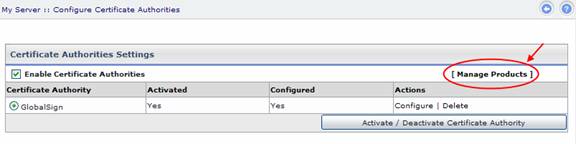
a) Select “Manage Products”. It opens following screen:
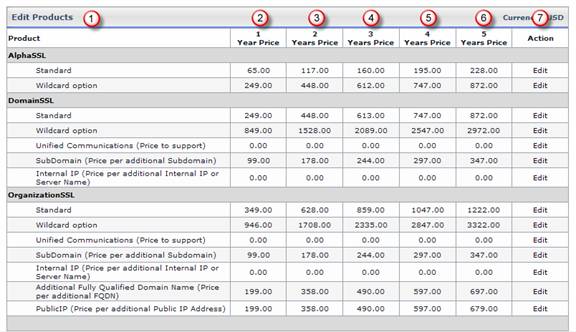
1) Product:
These are the products that you have selected during the configuration
process.
2) 1
Year Price: It is the 1 year price of each product.
3) 1
Year Price: It is the 2 year price of each product.
4) 1
Year Price: It is the 3 year price of each product.
5) 1
Year Price: It is the 4 year price of each product.
6) 1
Year Price: It is the 5 year price of each product.
7) Action:
It allows you modify the price of each product as required.
b) Select “Edit” to modify the price as required. It displays further options as:
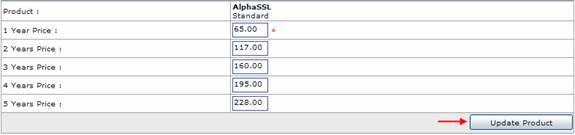
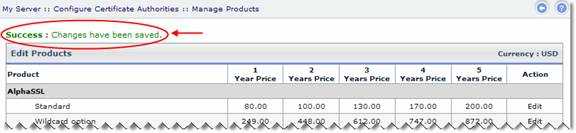
c) Modify price of any/all the year(s) for the selected product such as “Alpha SSL Standard” as required. Select “Update Product” to apply the changes. It displays success message as:
a) Login as a RESELLER, it opens following screen:
b) Select “System >> My Server”. It opens following screen:
c) Select “SSL Certificate Authorities Settings”. It opens following screen:
You can see that unlike HOST level, the Certificate Authorities Settings are already enabled, activated and configured at RESELLER level.
d) To edit the default configurations settings, select “Configure”. It opens the following screen:
All the settings are same as HOST configuration settings. The only addition here at RESELLER level is “Use Host Settings”.
e) Select “Yes” if you want to proceed with HOST’S settings. Otherwise, uncheck the checkbox. In case you unchecked the checkbox, it opens further options as:
|
|
|
All other configurations are same as stated before for HOST ADMINISTRATOR.
That’s it! You have successfully configured GLOBALSIGN with HC.
|
|
http://hostingcontroller.com/english/support/HC8Manuals/HC_SSL-Certificate_Installation/HC_SSL-Certificate_Installation.pdf |
In case of any
ambiguity/query regarding HC and GLOBALSIGN configurations, please feel
free to contact us at support@hostingcontroller.com