
GUIDE TO
SETUP
HC WITH
WHMCS
© Hosting
Controller 1998 – 2010. All Rights Reserved.
GUIDE TO
SETUP
HC WITH
WHMCS
© Hosting
Controller 1998 – 2010. All Rights Reserved.
Contents
How to Setup HOSTING CONTROLLER with WHMCS. 5
© 2010 Hosting
Controller. All Rights Reserved.
This document is the property of, and contains proprietary information of Hosting Controller. No part of this document may be reproduced or transmitted in any form or by any means, electronic or mechanical, including photocopying or recording, for any purpose other than consideration of the technical contents without the written acquiescence of a duly authorized representative of Hosting Controller.
|
TERMS/ SYMBOLS |
WHAT THEY MEAN? |
|
BOLD |
The
‘Bold & UPPERCASE’ text is used to highlight vital terms in the document. |
|
|
This
symbol is used as a sign for NOTE. It reminds about certain noteworthy steps
or takes your attention towards the significant tasks to be done or gives
additional information for your ease. |
|
|
This
symbol is used as a sign for WARNING. It highlights some steps that cannot be
skipped or should be followed as stated to avoid errors and confusion. |
This document is intended for those who
need to setup HOSTING CONTROLLER (HC) with WHMCS. It illustrates all the technicalities and
steps to employ HC with WHMCS.
|
|
|
It enables web hosting
companies to manage all their servers both Windows & Linux through
centralized interface. You can add multiple mail servers within a cluster and
offer MS-Exchange & SharePoint Hosting. You can expand your business with HC, from
one server to cluster of servers. It allows you to add new clusters as per your
requirements.
WHMCS is one of the most popular and renowned
name for providing Billing & Support Solutions for Web Hosts. It is the
complete client management billing and support solution.
Once you have
installed HC and performed all the basics, you need to follow
these steps to employ HC with WHMCS.
|
|
|
First of all, you need
to setup servers for WHMCS. To do so, follow the steps as stated below:
1. Copy WHMCS installation folder at HCInstalledPath/Tools.
|
|
|
2. At WHMCS\modules\servers\ path; create a
folder, name it “HC” and copy the HC.php file in it.
3. Repeat Step 1 and 2 for all of your Windows web
servers.
To install WHMCS from HC, follow the steps as stated below:
|
|
|
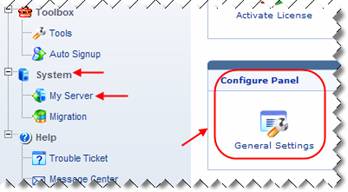
1. Enable WHMCS from “System >> My Server >>
Configure Panel >> General Settings”.
2. Select “Hosting Manager >> Billing
System >> Configure Billing”.
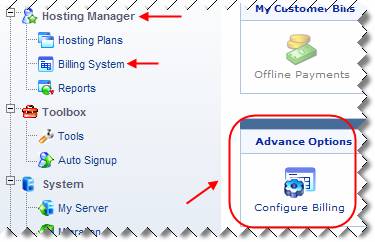
It opens following screen:
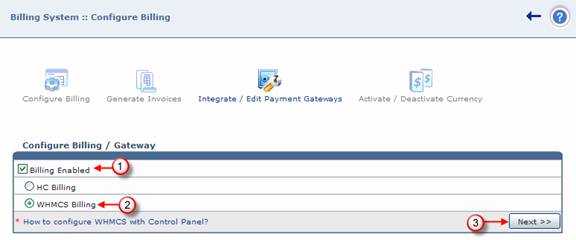
3.
Enable
billing and select “WHMCS Billing”.
4.
Select
“Next" to proceed. It opens following screen:
|
|
|
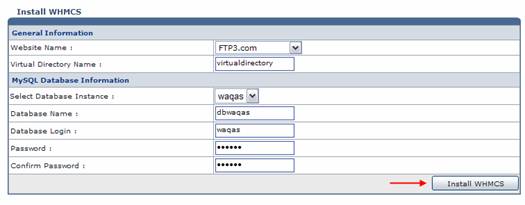
5. Select the website on which you want to
install WHMCS.
6.
Specify
virtual directory name.
|
|
|
7. Select the Database (DB) server
instance for WHMCS database.
8. Specify database name and the login
information as required.
9. Select “Install WHMCS” to install WHMCS with the specified information
10. Selecting "Install WHMCS"
opens the WHMCS installation wizard.
Run the wizard and follow the steps.
|
|
|
|
|
|
Once WHMCS is successfully installed, close
the wizard and return to HC panel.
Select “Finish Installation” to complete the installation process.
|
|
|
After successful
login, following screen is displayed:
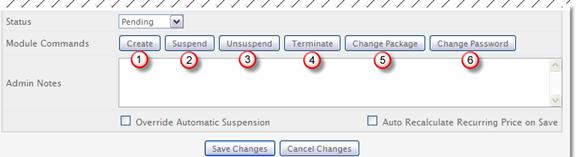
To configure WHMCS, follow the steps as stated below:
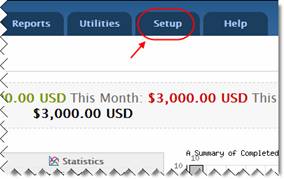
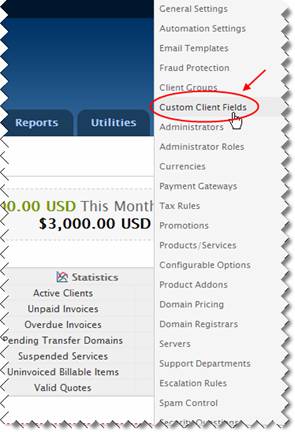
1. Go to “Setup >> Custom Client Fields”.
It opens following screen:
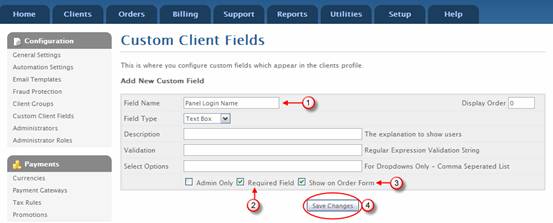
2. Specify information as required and select
“Save Changes”.
|
|
|
3. Prior to add server(s), you should know the
followings:
a.
You
can add any HC web server(s) in WHMCS.
|
|
|
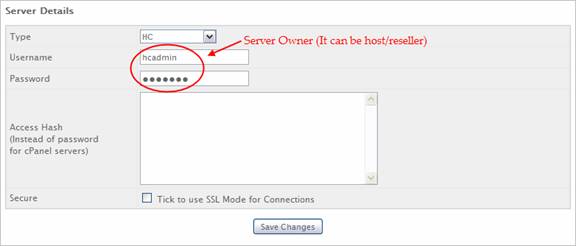
b. In “Server Details”, select “Type” as
HC.
c.
Specify
your HC login name and password.
|
|
|
4. Prior to add product(s), you should know the
followings:
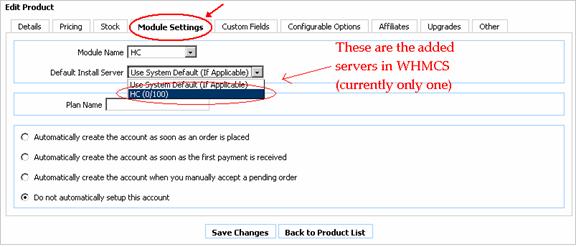
a. In “Module Settings”, select “Module
Name” as HC from the list.
b.
You
can assign any of your WHMCS added
servers to the specified product by selecting “Default Install Server”.
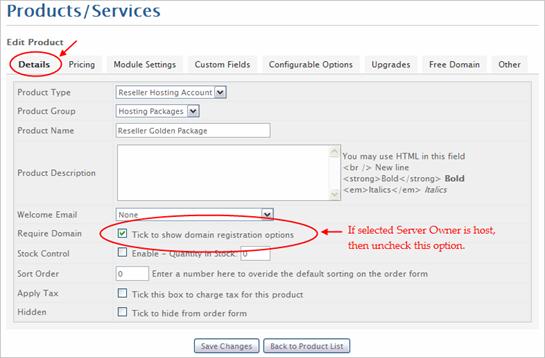
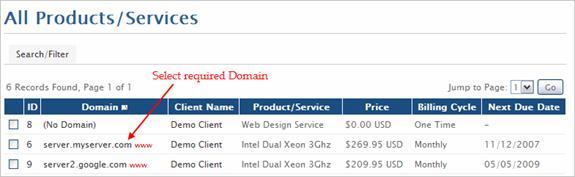
5. In “Details” tab, select “Tick to show domain
registration options” as you can not add a domain directly under a host in HC.
|
|
|
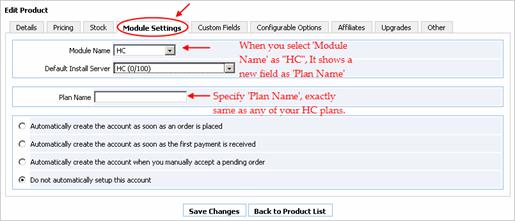
a. Specify “Plan Name” exactly same as any
of your HC plans depending upon your
selected “Default Install Server”.
That’s all for
configuring WHMCS.
|
|
|
|
|
|
In case of any
ambiguity/query regarding setting up HC with WHMCS, please feel free to contact us at support@hostingcontroller.com