
HC SHAREPOINT SERVICES MODULE SERVER CONFIGURATION
User Manual
© Hosting Controller 1998 – 2009. All Rights
Reserved.
HC SHAREPOINT SERVICES MODULE SERVER CONFIGURATION
User Manual
© Hosting Controller 1998 – 2009. All Rights
Reserved.
Contents
About
Microsoft Windows SharePoint Services.
© 2009 Hosting Controller. All Rights Reserved.
This document is the property of, and contains proprietary
information of Hosting Controller. No part of this document may be reproduced
or transmitted in any form or by any means, electronic or mechanical, including
photocopying or recording, for any purpose other than consideration of the
technical contents without the written acquiescence of a duly authorized
representative of Hosting Controller.
|
TERMS/ SYMBOLS |
WHAT THEY
MEAN? |
|
BOLD |
The ‘Bold & UPPERCASE’ text is used to highlight
vital terms in the document. |
|
|
This symbol is used as a sign for NOTE. It reminds
about certain noteworthy steps or takes your attention towards the
significant tasks to be done or gives additional information for your
ease. |
|
|
This symbol is used as a sign for WARNING. It
highlights some steps that cannot be skipped or should be followed as stated
to avoid errors and confusion. |
|
|
This symbol is used to show sample codes related to
various XML nodes. |
This document is intended for HOST ADMINISTRATORS/RESELLERS/WEB ADMINISTRATORS who need to install,
configure and manage SharePoint Server with HC. It explains all the technicalities and functionalities of server
configuration in detail. In addition to that, it also states the required steps
to ensure flawless working of SharePoint Server with HC.
|
|
|
It enables web hosting companies to manage all their servers
both Windows & Linux through centralized interface. You can add multiple
mail servers within a cluster and offer MS-Exchange & SharePoint hosting. You
can expand your business with HC,
from one server to cluster of servers. It allows you to add new clusters as per
your requirements.
You have to first install it on database server having
windows operating system. It can be a standalone server and can have other roles
such as Web, Mail and DNS as per your requirements. For further assistance,
refer to HC
Installation Guide.
Before Installation, you should know the pre-requisites of HC. You have to install Microsoft SQL Server. Instead of this, if
you want, you can also download HC installer,
in which MSDE is bundled free,
depending on your requirements. You have to install Mail Server such as Mail Enable or any other. For websites,
you have to install IIS and DNS.
Following figure illustrates working of HC in a cluster environment:
Microsoft Windows SharePoint Services 3.0 is a versatile technology that organizations and business units of all sizes can use to increase the efficiency of business processes and improve team productivity. With tools for collaboration that help people stay connected across organizational and geographic boundaries, Windows SharePoint Services (WSS) gives people access to information they need.
Built on Microsoft Windows Server 2003, Windows SharePoint
Services also provides a foundation platform for building Web-based business
applications that can flex and scale easily to meet the changing and growing
needs of your business. Robust administrative controls for managing storage and
Web infrastructure give IT departments a cost-effective way to implement and
manage a high-performance collaboration environment. With a familiar, Web-based
interface and close integration with everyday tools including the Microsoft
Office system, Windows SharePoint Services is easy to use and can be deployed
rapidly.
Some of the salient features of Microsoft Windows SharePoint
Services 3.0 are as follows:
Ø
Collaborate Easily and Effectively
Ø
Deploy a Manageable Infrastructure
Ø
Provide a Foundation of Web Based Applications
Ø
Empower IT to make a Strategic Impact
|
|
|
After installing HC and SharePoint Server on single or
multiple machines, you need to configure the entire setup. You have to
follow these steps as stated, to omit faults & errors during SharePoint
Server configuration.
Configuration of SharePoint Server comprises of mainly two
steps i.e. Enable SharePoint Server and
Add SharePoint Server. Later
sections of this document describe each of them in detail.
Follow these steps to enable SharePoint Server for your
cluster.
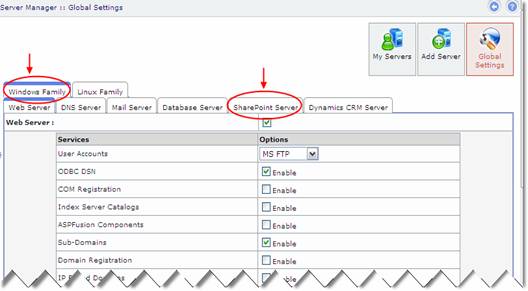
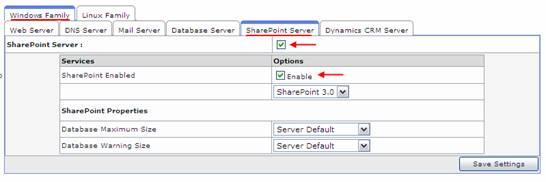
Enable the checkbox for
SharePoint Server and then select “Enable”. It enables the SharePoint Server.
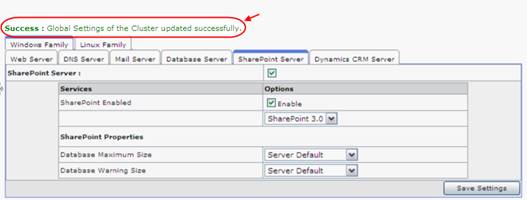
Select your required options from the list for the services and select “Save
Settings”. It updates the changes and enables SharePoint Server for your
cluster as shown below:
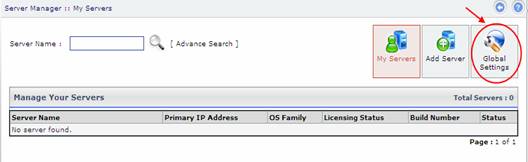
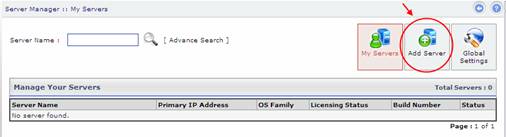
To make your server a SharePoint Server, you have to add a
server and assign it a role such as SharePoint Server. Follow these steps to make
your server a SharePoint Server.
It opens
following screen:
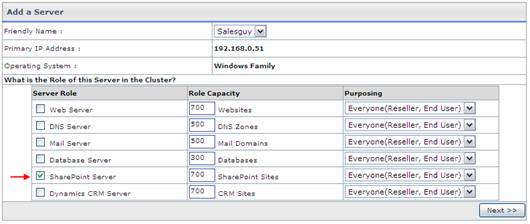
§
Friendly Name:
It is the list of available servers; you can select
one as per your requirements.
§
Primary IP Address:
It is the unique IP Address of the selected Server.
§
Operating System:
It shows the supported operating system.
§
Server Role:
It allows you to select role for the server, you
are going to add.
§
Role Capacity:
It shows the maximum limit of supported
domains/DNS/mail domains/databases/Sites on Web/DNS/Mail/Database/SharePoint
Server respectively.
§
Purposing:
It allows you to specify end user for the selected
server. You can dedicate your server to only resellers as well as to everyone
according to your requirements.
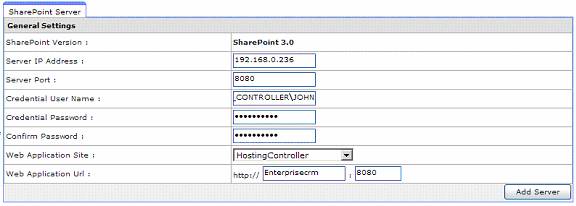
§
SharePoint Version:
It is the SharePoint Version.
§
Server IP Address:
It is the IP address of the server, you are going
to add.
§
It is the Port of web application. In SharePoint,
the sites are created under that web application. You can create this
web application using “SharePoint Central Site Administration” Web site.
§
Credential User name:
Specify user name in this field. It should be in
the format as “DOMAIN\USER”.
|
|
|
§
Credential Password:
Specify password to access the server.
§
Confirm Password:
Re-enter your password in this field.
§
Web Application Site:
Select your web application from the list.
§
Web Application URL:
Specify URL for web application web site.
Select “Add Server” to apply the changes. It adds a
SharePoint Server with the specified information.
Once
you have installed HC and SharePoint
Server on a
single or multiple machines, you need to create a RESELLER. A RESELLER then
creates DOMAIN under which a SharePoint
sites are going to be created.
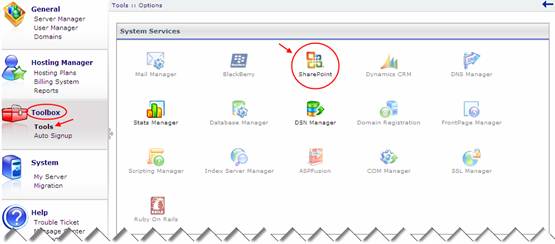
In order to manage SharePoint Server, logon as a Reseller/Web Admin and follow these steps as stated:
|
|
|
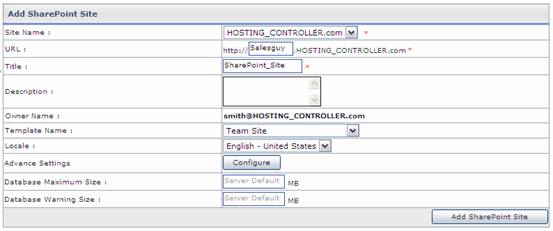
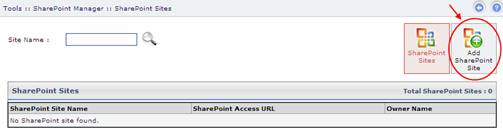
§
Site Name:
It is the domain
name under which SharePoint sites are created. Select your required domain from
the list. All the SharePoint users have this domain in their UserPrincipalName
in Active Directory like user@domain.com and are kept in an Organizational Unit in
Active Directory with the path: ADDomain\Hosting\Reseller\Domain.com
§
URL:
It is the URL of the site being created.
§
Title:
Specify title of the SharePoint Site being added.
§
Description:
Specify brief description regarding the SharePoint
Site.
§
Owner Name:
It shows the owner name of this website being created. It is always the web admin of the domain, under which this SharePoint site is being created.
§
Template Name:
Select your required skin/template from the list for
the site, you are going to add.
§
Locale:
Select required locale from the list. It defines
user’s language.
§
Advance Settings:
It shows further more options as:
·
Database
Maximum Size:
Either specify maximum size for the database in
this field or leave it as “Server Default” to assign default value to this
field.
·
Database
Warning Size:
Specify maximum size for the database, to send a
warning to the user when the database size reaches the specified limit. To
assign default value to this field, leave it as “Server Default”.
Select “Add SharePoint Site”. It adds the site with
the specified information. You can add multiple SharePoint Sites by following
the steps stated above.
In case of any
ambiguity/query regarding HC, please
feel free to contact us at support@hostingcontroller.com
