|
|
|
|
Creating Master Virtual Machine
|
|
A Master Virtual Machine is created to be used with the VHD template. |
To create master virtual machine:
Launch
Hyper-V Manager.
The Hyper-V Manager is launched.
|
|
To launch Hyper-V Manager, on the Start menu, click Administrative Tools, and then Hyper-V Manager. |
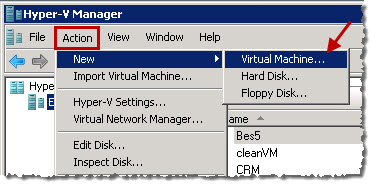
On
the Action menu, point to
New, and then
click Virtual Machine.
The Virtual Machine creation wizard is started.
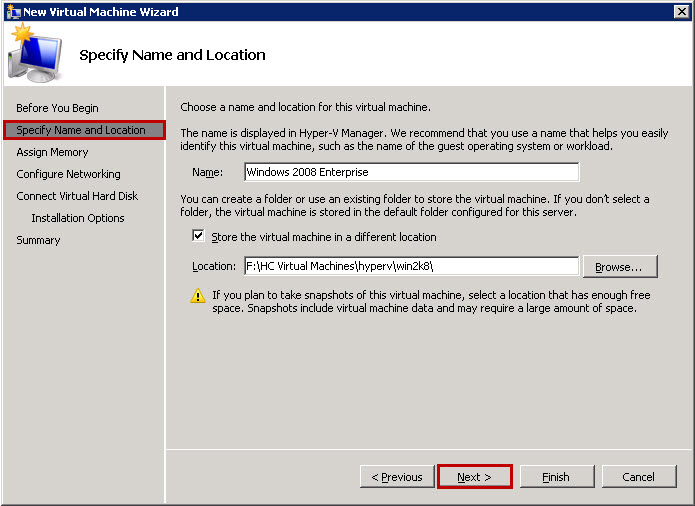
Type Name of the virtual machine.
|
|
For your convenience, specify some meaning full name for Virtual Machine. |
Select Store the Virtual Machine in a Different Location check box to enter path for the virtual machine to be stored.
Enter Location of the virtual machine to be stored.
|
|
It is better to create virtual machines on a separate hard disk volume. |
|
|
Again for your convenience define a good structure for virtual machines to avoid ambiguities later on. |
Click
Next.
The Assign Memory screen is displayed.
Type Memory.
Click
Next.
The Configure Networking screen is displayed.
Click the Connection arrow and select the network adapter for the virtual machine.
Click
Next.
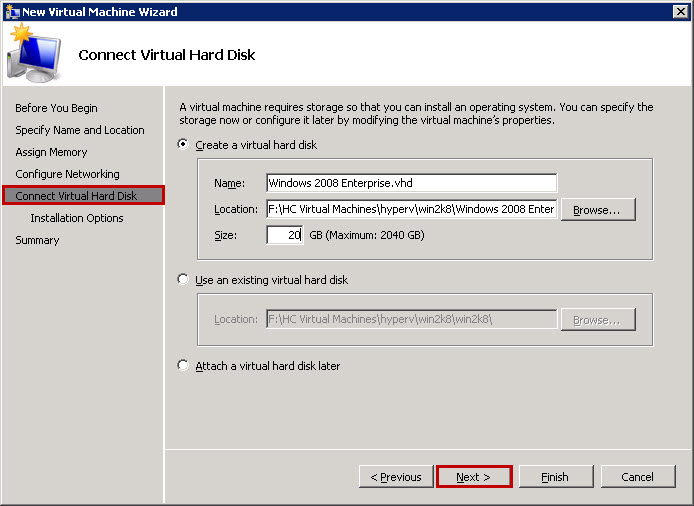
The Connect Virtual Hard Disk screen is displayed.
Click Create a virtual hard disk.
Specify Name of the virtual machine storage.
Enter Location of the virtual machine storage.
Type Size of the virtual machine storage.
|
|
Specify hard disk size that is enough to install the Windows Server 2008. |
Click
Next.
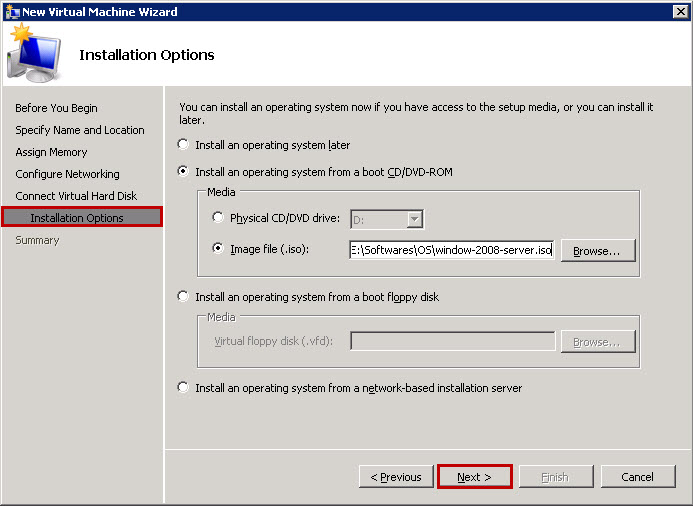
The Installation Options screen is displayed.
Click Install an operating system from a boot CD/DVD-ROM.
Click the Image file (.ISO).
Enter path for the image file.
Click
Next.
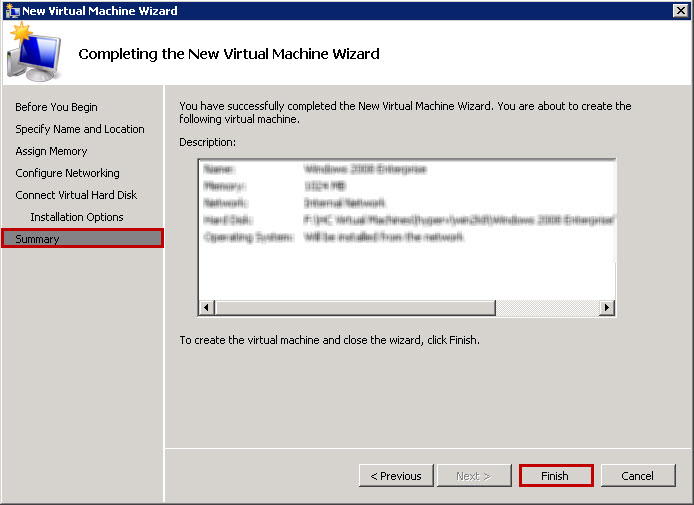
The Summary screen is displayed.
Click
Finish.
The Virtual Machine is created.
Creating Master Virtual Machine


![]()
|
© Hosting Controller 1998-2011. All Rights Reserved |


