HOSTING CONTROLLER 7C MANUALS :: Host Admin |
|
HOSTING CONTROLLER 7C MANUALS :: Host Admin |
|
ADD PLAN
Hosting Controller enables you to set up and customize any number of hosting plans for your customers (resellers).
You can set up the name, description, status, visibility, cancellation policy, and pricing information. Once you have added a new plan, you can edit the properties of the plan.
To add a hosting plan:
Click on the Hosting Plan menu under the Hosting Manager section.
Click the Add Plan submenu.
You will be displayed with the Add plan page
Provide the following information for the new plan as required and click the Add Plan button:
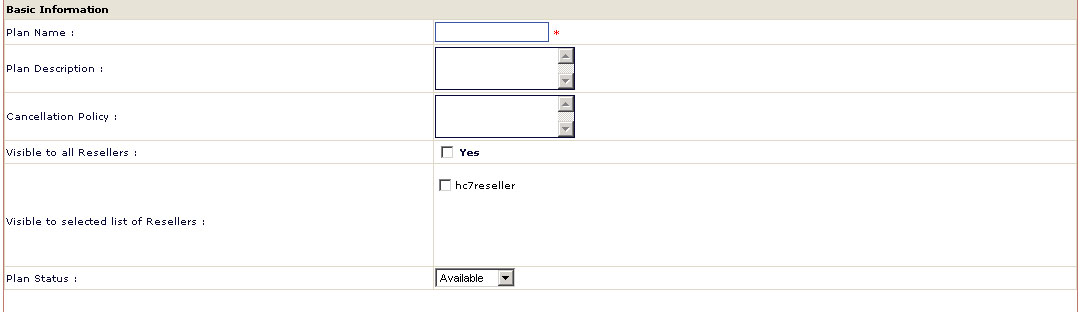
Basic Information:
This includes the basic information related to the plan, including plan name its description its status if it available to all resellers and so on.
Plan Name:
This is the name you want to set for the new plan to be added.
Plan Description:
This is any relevant information for the new plan to make it more descriptive. Your users will see this description in the plan details option in their panel.
Cancelation Policy:
Here you have to provide the cancellation policy for the new plan. You may apply the same cancellation policy for all the plans or you any individual policies on each plans. It totally depends on your hosting business rules.
Visible To All Resellers:
Tick this check box to make this plan visible to all users. In this case all the resellers will be able to see this plan in the Purchase A Plan section of their panels.
Visible To Selected List Of Reseller:
You can make the plan visible to all users or you can make it visible for selected resellers only. In case you want to make it available for selective the resellers, select the required reseller(s) from the following.
Tick the check box in front of the desired reseller(s). The plan will only be visible to those reseller(s) to purchase.
Plan Status:
Select the plan status for the new plan. It can be either available or unavailable. If you select available the plan will be available for the users to purchase. If you select it to be Unavailable will not be visible for the users to purchase, also the Sell Button for you will be disabled.
Financial Details:
These are the financial details for the new plan to be added. In case you are using the built-in billing of the panel you must provide this information correctly and carefully. You will not be displayed with this page in case you have not enabled the auto-billing of the panel.
Setup Price:
This is the price that you want to charge only for the first time when the plan is sold.
Promotional Duration:
Select the Promotional Duration from the drop down menu. The promotional period is used to set a discount for a specific period of time on the plan.
For example, it you want to offer a 50% discount on a $20/month plan for one month then set 1 here. Panel will charge $10 for 1 month and $20 from the 2nd month onwards.
Promotional Price:
Enter the price that you wish to set for the Promotional Duration which you have selected above.
Check the Radio Button to set the Default Recurring Duration for this plan:
The panel allows flexible recurring duration. It allows Monthly, Quarterly, Bi-Annual, Yearly or any duration of your own choice. The users will be charged the recurring price after the selected duration.
Recurring Duration:
Here enter the Recurring Duration for the plan. The Recurring Duration is the interval after which the user (reseller in this case) should be charged a set price. For example, if you select Quarterly, then the user will be charged after every quarter year (4 months).
Note:
You are displayed
with the financial details only if you have enabled
the auto-billing of the panel.
To enable billing refer the Configure
Billing.
The Recurring Duration starts when the Promotional Duration ends. If there was no Promotional Period then the recurring duration starts with the plan setup.
Recurring Price:
Here enter the recurring price. For example if you enter 10 then the user will be charged $10 after the interval set in the Promotional Duration select box above, in case no promotional duration was offered then the recurring price will be charged with the plan setup.

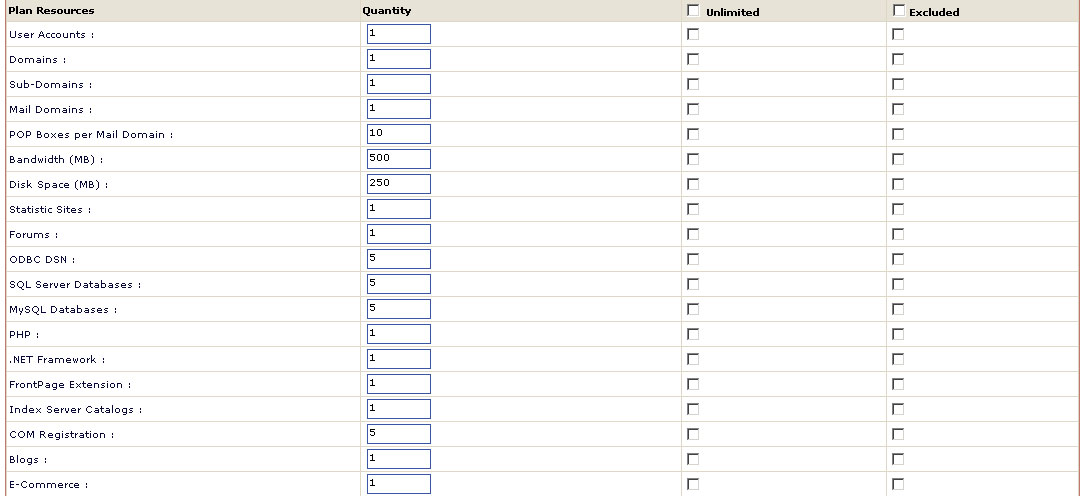
Plan Resources:
These are the resources of a plan. They can be edited according to the plan needs. You can set a desired quantity, make it unlimited for the user or even exclude it from the plan. Here only those resources are displayed that were enabled, in the Server Manager section.
Quantity:
Here enter the quantity of the respective resource you want to add for the new plan.
Unlimited:
If you tick the check box at the top of this column, all the quantities will be added unlimited to this plan. If you want to add selective unlimited resource(s), tick the respective check box for that resource(s).
Excluded:
You may wish to exclude any resource from the plan to be added. To exclude any desired resource(s) tick the respective check box for that resource(s).